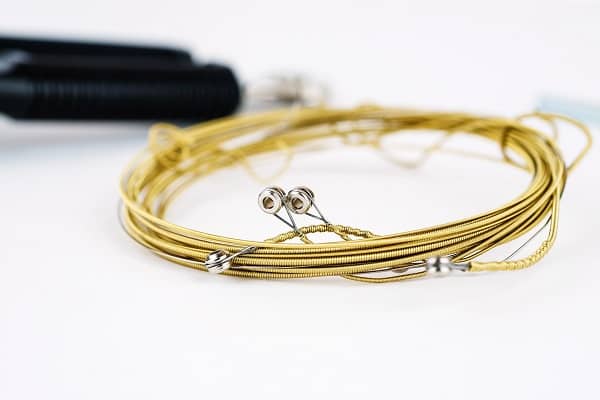
Learning how to string a guitar correctly is an essential skill for any guitarist, but the process can seem daunting if you’ve never done it before. I’ve been there too!
Restringing your guitar may feel intimidating at first, but having the proper technique ensures your instrument sounds its absolute best.
In this complete guide to how to string a guitar, I’ll walk you through the entire process from start to finish.
Whether you’re a total beginner looking to restring your guitar for the first time or a seasoned player needing a refresher, you’ll learn how to safely remove old strings, put on a fresh set, stretch them properly, and even do a full setup for optimal intonation.
Let’s dive into this step-by-step tutorial on how to string a guitar and get your instrument back into peak playing condition.
Getting Started – Tools and Materials
Before we begin, you’ll need to gather a few essential tools and materials:
Tools
- String winder – Makes removing old strings and installing new ones much faster. Don’t have one? You can use a pencil or your fingers in a pinch.
- Wire cutters – Cleanly snip off excess string after winding and tuning. Sharp scissors work too.
- Tuner – Essential for tuning to proper pitches after restringing. Grab a clip-on or smartphone tuner.
- Hex wrenches – For truss rod and bridge adjustments if needed. Usually included with electric guitars.
Guitar Parts
It helps to be familiar with the basic parts of your guitar’s anatomy:
- Headstock – Houses the tuning machines that hold the strings in place. Located at the end of the guitar neck.
- Tuning machines – Mechanisms used to tighten and loosen strings, adjust tension, and change pitch. Also called tuners, pegs or keys.
- Nut – Located where the neck meets the headstock. Contains slots that strings pass through on their way to the tuners.
- Frets – Metal strips running perpendicular across the fingerboard that produce notes when strings are pressed down behind them.
- Fretboard – The playing surface on the neck. Usually made of rosewood, maple, ebony, etc.
Got all that? Great! Now let’s look at the two main types of guitar strings.
String Types

Guitar strings come in two main varieties: wound and plain.
Plain Strings: The high E and B strings. A single strand of steel wire for brighter tones. Plain strings are single pieces of cylindrical steel wire where thickness determines gauge and provides brighter tones.
Wound strings: Wound strings have a core wire wrapped by an outer wire, the combination providing the overall gauge. Generally, the low E, A, D & G strings are wound strings made of bronze, nickel, steel, etc.
Most electric sets today have a mix of 3 plain and 3 wound strings, though some still prefer a wound 3rd string for a vintage tone. Wound strings tend to have a mellower, smoother sound while plain have more twang and brightness.
The type of winding also impacts tone and feel. Choosing the right mix of plain and wound strings affects sound, playability and tension so it’s important to select the proper strings for your guitar and musical needs.
String Gauges
Strings also vary in thickness/gauge. Heavier gauges have higher tension and fuller tone, while lighter ones have looser feel and brighter sound. Common gauges:
Light – Best for beginners. Lighter gauges, like .009 to .042, are easier to press down and more comfortable. Lighter strings suit smoother styles and allow more lead work.
Medium – The most popular choice. Provide a balanced tone and playability. For electric guitars, medium gauge strings are typically .010 and .011. For acoustic guitars, medium gauge strings can also include .012 and .013. However, the specific gauges in a set can vary slightly depending on the manufacturer.
Heavy – Heavier gauges, like .012 to .052, produce louder volume and deeper tone. Heavier string sets suit aggressive strumming styles. Harder to fret and can be stiff.
String Packaging
Guitar strings are packaged in sets that contain 6 strings – one for each guitar string. They come in sealed pouches or sets of 6 individual strings.
Sets are sold by the gauge range. Popular options are extra light, light, medium, and heavy. Strings also come in individual packs if you want to customize gauges.
Buy sets for full restrings or individuals for odd string changes. Check labeling for contents. Consider stocking various gauges for different needs.
Now that you know the basics, let’s get started!
Guide on How to String Your Guitar Properly
Step 1: Removing the Old Strings
The first step in restringing your guitar is to safely remove the old strings. Start by detuning each string using your tuner until they are completely slack.
Once detuned, cut each string above the bridge to prevent any damage to your guitar’s finish. Unwind any remaining string from the tuners and pull it out.
For acoustic guitars, use your string winder’s notch to safely remove the bridge pins. This is also a great opportunity to clean your guitar. Use a soft cloth and cleaner to scrub any dirt off the frets, fingerboard, nut, and bridge.
Step 2: Installing New Strings

The next step is to install the new strings. Start by identifying each string based on the ball ends or string packaging.
Feed the plain or ball end through the rear bridge hole, ensuring it passes all the way through. Guide the string up until it sits cleanly in its corresponding nut slot. Bring the string over the fretboard and up to the tuner, kinking it slightly before winding so it catches.
Tune up gradually in small increments to prevent breakage. After tuning, lightly tug along the strings to stretch them out. Use your cutters to trim any excess string so it’s flush with the post.
Finally, lubricate the nut slots with a pencil to allow strings to move smoothly and improve tuning stability.
Step 3: Tuning and Maintenance Tips
Now that you’ve installed new strings, there are a few more steps to ensure your guitar plays its best. Invest in a reliable chromatic tuner for precise intonation. Keep stretching those new strings every few minutes after tuning up for accurate pitch.
Clean your guitar after each session to remove oils and grime that can affect sustain. Unfinished woods like rosewood and ebony require occasional oiling with a fretboard conditioner to prevent drying out.
If you’ve changed the string gauge, you may need a truss rod adjustment to account for increased/reduced tension on the neck. Consider optimizing string height as heavier strings require higher action to avoid buzzing on frets.
Regularly change your strings—at least every 3 months or more often if you notice tone degradation.
By following these steps and maintaining consistent care, your guitar will always sound its best! Now let’s go over some common stringing issues and fixes.
Check this video demonstrating a simple process for stringing an electric guitar:

Troubleshooting Common Problems
Retuning constantly? Strings feeling dead? Here are some common problems and solutions:
Strings Slipping Out of Tune: If new strings won’t hold their pitch, ensure strings wrap down properly on posts and nut slots are lubricated.
Fret Buzz and Dead Notes: Raise action slightly if strings are buzzing. If notes sound choked, the action may be too high.
Breaking Strings: This happens from overtightening strings too quickly during tuning. Always bring up to pitch gradually.
Poor Intonation: Make sure strings are stretched thoroughly and ball ends are flush with the bridge. Double check saddle positions.
Stiff/Tight Strings: Try lighter gauge strings or adjust the truss rod to reduce the neck bow if the strings feel too tight.
Losing Sustain and Tone: Replace strings regularly before they lose their vibrance. Clean after playing to keep them fresh.
Okay, you know how to restring, tune and care for your strings. But what about optimizing the guitar itself? Let’s look at how to set it up properly.
Guitar Setup and Intonation
Putting on new strings is the perfect time to dial in your guitar’s playability:
Adjust Bridge Height: Use bridge screws or an Allen wrench to raise/lower the bridge according to the new string size.
Check Nut Slot Depth: Inspect nut slots for proper string clearance. File too-shallow slots to avoid binding.
Tweak Truss Rod: Turn the truss rod nut clockwise/counter-clockwise to straighten or add a bow as needed. Go slowly in 1/8 turns.
Set Pickup Height: Adjust polepieces and overall pickup height for balanced output across strings.
Set Intonation: Move saddles back to lengthen vibrating string lengths and correct flat notes.
Lubricate Nut and Bridge: Graphite for nut, lighter fluid for bridge pins. Reduce friction for tuning stability.
Nailing your guitar’s setup makes tuning headaches and intonation issues a thing of the past. Invest time into learning proper setup and you’ll be rewarded with better tone and playability.
As you can see, stringing your guitar correctly involves much more than just slapping on a new set. Taking a methodical approach ensures everything is seated, wound and stretched properly so your strings last longer and play perfectly in tune.
The more you practice restringing, the faster you’ll get. But don’t rush! Rushing leads to slack wrapping, improperly stretched strings and dead notes.
Patience and the right technique will have you strumming an optimally intonated guitar in no time.
Remember to clean your strings after each use, oil the fretboard regularly, and swap strings out once a month for the best performance. And don’t be afraid to tweak the truss rod or bridge saddles to dial in the perfect low action setup.
With the skills you’ve learned here, you can confidently restring your guitar and perform complete intonation setups like a pro. So grab your favorite axe and get ready to make some serious music!
About the Author
Team Guitar Top Review Talk about Guitars! We are a group of friends that bonded over their shared love of playing guitar. We all have different backgrounds and experiences with music, but we share a passion for writing about the things that we love.


